 Building Output
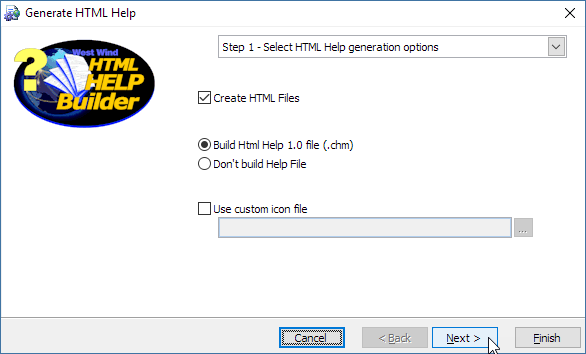
Whew, we've now built a basic help project. It's time to build it into an HTML Help file. To do this fire up the Build Help Wizard from the toolbar.
Make sure Html Help Workshop is Installed
If the Html Help 1.0 option isn't enabled, the Help Compiler is not installed. Please see the Requirements topic for information on where to download the compiler and install it.
Note that if you don't care about HTML Help output you can just tick the Don't build HTML Help File option to only generate the self-contained Web content.
This page lets you choose what to create when generating your help output.
Create Html Files
This option specifies whether the HTML files get generated from your project. It's useful to turn this option off if you need to only generate a CHM file or if you've changed some project options like icons that don't affect the HTML output.
Build Html Help 1.0 file
This is the standard Help Format for Windows applications. If you're building end user documentation for your application you will want to create a CHM file which you can easily plug into most Windows based development environments such as .NET WinForms, VB6, Visual FoxPro, Delphi and so on. CHM is the most common Help format and we suggest you use it except for special situations.
Don't build Help file
Sometimes you just want to generate the HTML files - for example when you prepare the files to be sent up to your Web site via FTP.
Custom Icon File
You can also specify a custom icon file if you would like to use custom icons. Be aware that this is an advanced feature and requires that you configure your topic types for custom icon usage and that you ship a separate icon file in the Windows directory. For more information see the Using custom icons in your Help file.
Select the topics to generate
The second screen of the Wizard is designed to allow you to optionally choose the topic trees that are used to generate the final help file. Sometimes you might want to generate documentation just for your end users so it might make sense to not generate the developer documentation into the final help file.
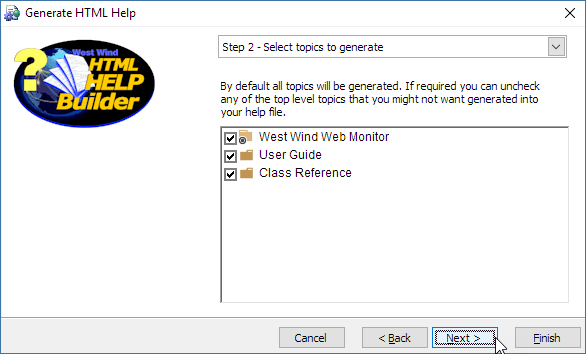
The dialog allows you to select and unselect top level topics that are to be included in your final help file or HTML output. By default all topics are selected - if you want to exclude certain topic trees from inclusion simply uncheck the checkbox for this topic. When you uncheck a topic this topic and all child topics are removed from the help file resulting in smaller size.
Click Next to get to the final confirmation page of the Wizard, then Finish and let 'er rip! Help Builder now goes through the process of generating hte HTML based content and then proceeds to build a CHM Html Help file. When it's done it brings up a finished compilation form:
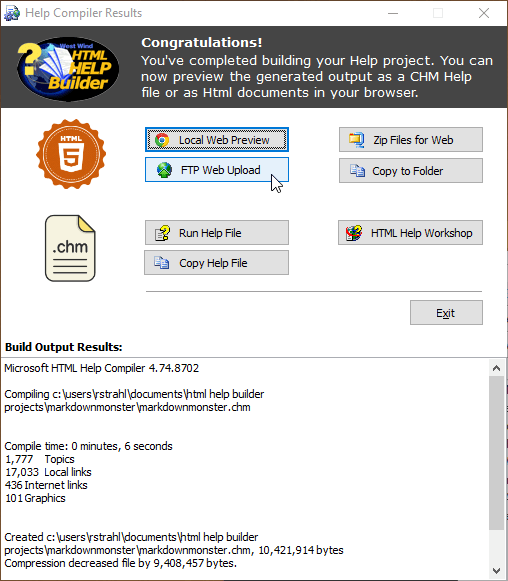
Note:
If there are errors during compilation these errors will be displayed in the text area. The Html Help Compiler will frequently display some topic compilation errors that are non-fatal even though the error messages appear rather serious. In most cases, those errors are mere warnings and your help file will actually have compiled. To check Run the HTML Help File.
From here you can preview the help file, view the Web view of the project, upload your project to an FTP site, open Html Help Workshop or copy the CHM file to another location on your disk.
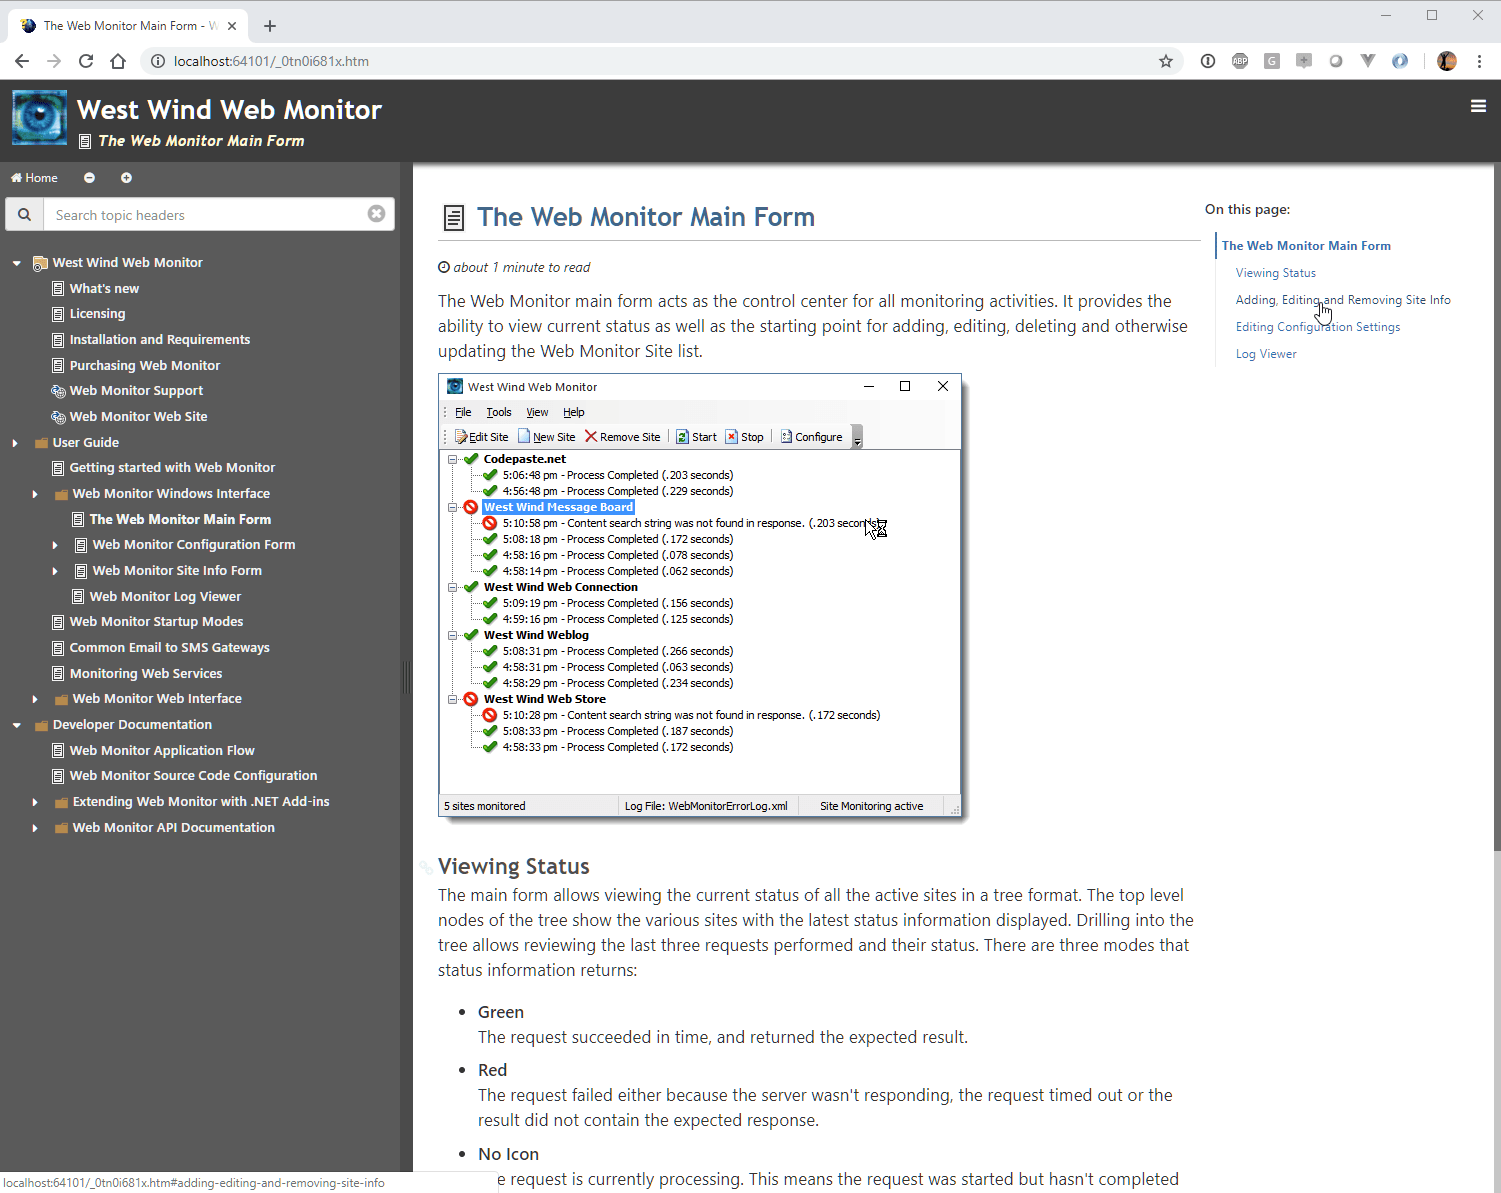
Local Web Preview - Review the HTML Output
Help Builder generates plain HTML output for a fully self-contained static Web site, that you can copy straight to a Web server. The site includes an interactive table of contents, basic topic header search, a navigation bar (on wider screens) and more.
Here's what the generated site looks like:
Uploading the Web Site via FTP
To deploy these Web ready files you have a number of options:
- Upload via the built-in FTP
- Zip and package and unpack on a Web site
- Manually copy files
To upload files to a Web Site using the build in FTP client you can use the FTP Upload option:

To make this work you'll need an FTP folder that you can upload to.
Note: There's no support for FTPS or SFTP for encrypted FTP at this time.
CHM Help File Output
If you generate an HTML Help (CHM) file here's what it looks like:
Note: Help Builder projects are also fully compatible with HTML Help Workshop and the generated files can be open in that tool and customize the final look and feel of the CHM file.
Copy Help File
This option copies the generated CHM file to a new location that you can choose. Opens a Save File dialog to save the CHM file.
Copy to Folder
Copies the Help Project HTML output files and folder structure to a new, clean folder that you specify. The folder you pick will be deleted before copying the completed Help Project HTML files.
Use this option if you have direct file access to a Web site for publishing, or you want to create a self-contained install locally that you want to test with. Note that you need a Web server to preview the project (see below).
Zip Files for Web
Like the Copy to Folder option, Zip Files for Web creates a self-contained, clean folder of the Web project output files and then zips up the content of that folder into a Zip file.
This option packages all the files required to use the Generated HTML as a Web site into a Zip file that you can more easily copy to your Web site or other machine for access.
The output in the zip file is self-contained and you can easily move this file to a Web server or another machine to unzip the Help Project to.
HTML Output Requires a Web Server
Please note that the HTML output generated by Help Builder does not run directly from disk by loading
index.htmwith a browser off the file system. If you do the table contents and topic navigation will not as these operations require dynamic loading of content that is not supported with local file URLs.You can use Help Builder's built in preview from Tools->Open HTML Project in Web Browser or you can install a local Web Server yourself:
- IIS Express (instructions)
- http-server (NodeJs - npm install -g http-server)
- MiniWeb
See also
Step By Step Guide | Generating Microsoft Word Output |
Comment or report problem with topic