 Item Image Guidelines
 Item Image Guidelines
Item images can be displayed with images automatically by specifying an image file in the Items table for the Image field. If this field is filled in the image is expected to live in the itemimages/ directory of the Web Store application.
There are two types of images:
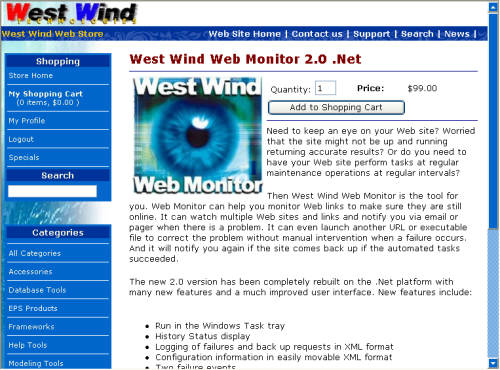
- Primary Item Image
This is the regular size image. Specified in the Items table Image field this image is displayed when you pop up an item in display view.
Recommended size: 220 pixels wide or so.
Filename: ItemImages/<ImageField value>
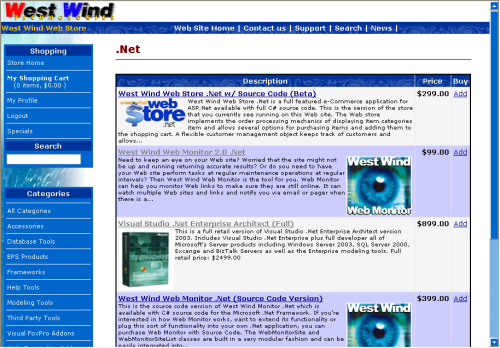
- Small Image Size
This image is named with sm_ prefix from the Image field and is used for display in the Abstract item list. It can also be used for specials. If you use either the Abstract Item display list or the Specials control make sure you have sm_ versions of the item image available.
Recommended size: 100 pixels wide or so.
Filename: ItemImages/sm_<ImageField value>
Uploading Images
You can upload images to the server manually of course. As long as you make sure that the image file gets stored into the ItemImages directory and that the filename matches the name specified in the Items table providing both the direct filename and the sm_ filename.You can also upload images through the Item Edit page (EditInventoryItem.aspx) on the Administration page. When you are editing an item simply move down to the item image area and click on the Upload button. The upload process allows uploading of both the standard and small images and offers options to automatically resize the images or even create the smaller image from the single uploaded file.

Comment or report problem with topic